We use cookies to make your experience better. To comply with the new e-Privacy directive, we need to ask for your consent to set the cookies. Learn more.


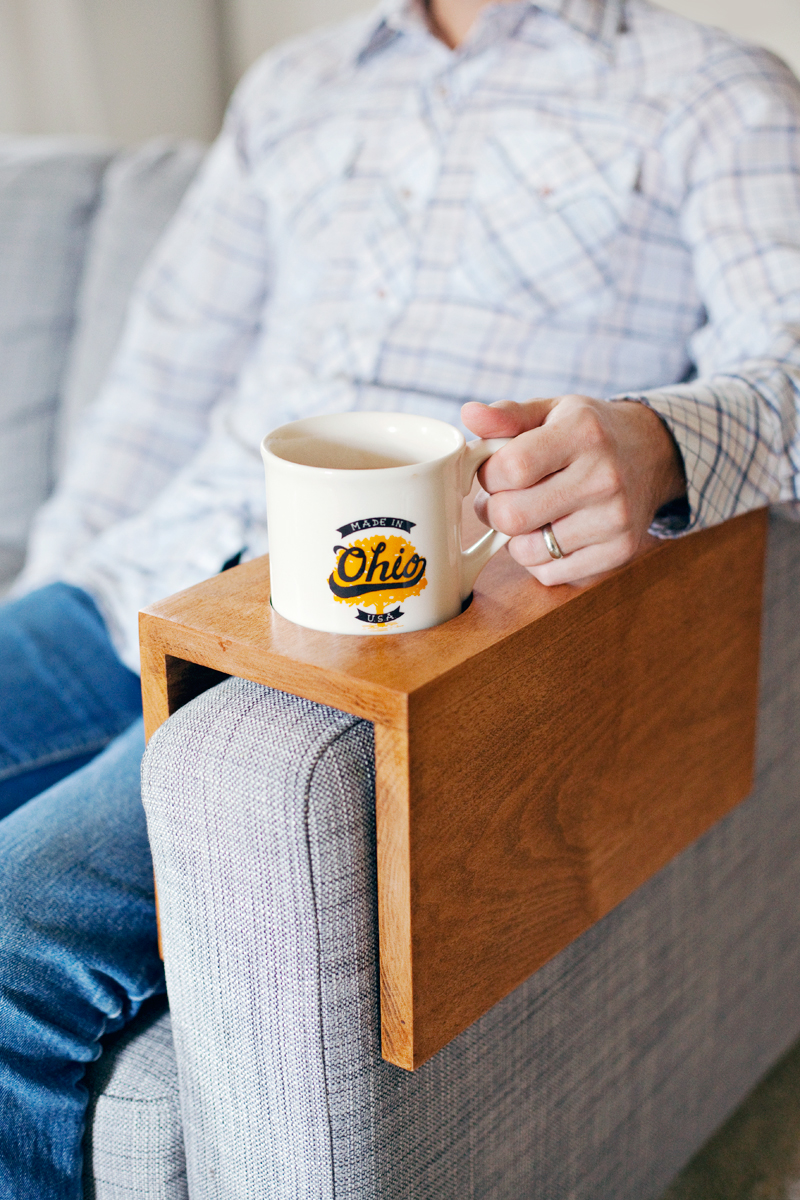
Wooden Sofa Sleeve Cup Holder
Thanks to
This project has optional steps and materials you can skip!
If you are intimidated of using pocket holes with a Kreg jig, shown in steps 4 and 7, don't worry! I determined that these steps are truly optional, as wood glue provides a very strong hold for wooden accessories like this that are gently used. Just don't let your kids frequently use it as a step stool, and it should hold up fine without completing steps 4 and 7.
Step #1: Tools & Materials
-clamps (at least 8" long)
-hole saw in diameter of your choice (based on your most used cup diameter) A larger hole saw will require the use of a drill press. I used a 3 7/8" hole saw that I attached with this arbor. My hole saw was too large to manage with just a power drill, so I opted to use a friend's drill press to cut the hole. See step two for more info.
-tape measure
-pencil
-power drill (You only need this if you're using pocket screws and/or a hole saw smaller than 2.5".)
Optional tool:
–Kreg pocket hole kit – This is an optional tool shown in steps 4 and 7 that will add to the strength and life of your sofa sleeve, but is most likely unnecessary for a gently used sofa sleeve.
Materials:
-wooden board cut into three equal lengths—see step one for info on sizes to choose
-piece of thin plywood—see step one for size information. You can find thin 1/8" plywood in the wood section of your local craft store.
-wood glue
-wood stain (I used a mix of Minwax's Early American stain and Minwax's gel stain Antique Maple.)
–150 grit sandpaper or 180 grit sandpaper
–grade 0000 steel wool
-polyurethane
Optional Materials:
-veneer tape—this is an optional way to finish ugly cut edges of your lumber if you aren't using high quality hard wood such as maple, oak, or poplar. Softer wood like pine will soak up more stain on the cut edges, which will make them dark. You may choose to iron on veneer tape before staining to avoid this.
-1.25" Kreg screws—you will only need these optional screws if you plan to add the additional support of pocket hole screws in steps 4 and 7. Otherwise, wood glue will suffice.
Step #2: Size it up
Determine the sizes of wood you will need by measuring your sofa or chair arm. You will need to know the width of your arm as well as the height. Use the following formulas to determine the wood pieces you will need cut for you at the lumber yard if you don't have the tools to cut the wood at home. The following formulas assume that the boards you use will be 3/4" thick, which is the standard thickness for 1x boards, such as 1×6 or 1×8 boards.
Top piece of wood—length: 14" / width: width of arm + 1.5"
Side pieces of wood—length: 14" / width: height of arm from cushion—you should round down to the nearest board width.
1/8" plywood piece—length: width of arm / width: width of arm (This is the piece that goes underneath the cup hole.)
My measurements for an Ikea Karlstad sofa: I used three 14" lengths of 1×8 board, and simply trimmed the width of one length to 6.25", which is the width I needed for the top piece of my sofa sleeve.
Step #3: Make the hole for Coffee Cup
Center the hole saw on one end of your top piece of wood. Mark the middle point where the pilot drill of your hole saw will get the hole started. It is important to note that if you are using a big hole saw, as I did, you will probably not be able to control the drill with your arms, as muscly as they may be. It will skip around and ruin the finish of your wood. I had to bring my piece of wood to a friend's house to clamp it in place while cutting the hole with a drill press.
Step #4: Sanding
Sand the inside of the hole and the top and bottom of the wood, being careful to stay away from the edges and corners. If you round the corners of the board from sanding the edges, the boards will not be flush when joined together in step 5.
Step #5: Clamping
This step is optional. Clamp your Kreg jig as shown above to drill pocket holes on either end of just one side of each side board. These pocket holes will only be visible from the inside of the sofa sleeve. Using the pocket screws will provide for a very secure connection when you join each board together, but is probably not necessary for the end use of the sofa sleeve.
It is always a good idea to practice pocket hole placement on scrap wood before completing them on your finished boards.
Step #6: Add Wood Glue
Apply a somewhat thin layer of wood glue to one long edge of your side board (the side closest to your pocket holes if you chose to use them). Smoothing it with your fingers can be helpful, just keep a damp cloth nearby to wipe your fingers.
You should use a damp rag to wipe away all seeping wood glue immediately. Wood glue is very difficult to remove after it's dried, even with heavy sanding.
Step Six: Clamp the glued side board to the bottom of the top board (making sure your pocket holes are facing the inside if you chose to make pocket holes). Before you tighten the clamps completely, make sure the boards are perfectly lined up on the ends and flush at their corners.
Step #7: Screwing it together
This step is optional. If you have chosen to use pocket screws, now is the time to screw them into place. If your pieces of wood pull away from each other at all, wait to drill in the screws until the wood glue has set up completely (follow instructions on glue bottle).
Step #8: Sand some more...
fter both side pieces have been glued and clamped into place, give the hole piece a really good sanding. I used 150 grit sandpaper for this, but if your wood is really soft (like pine), you might want to finish up with something closer to 200 grit to avoid any scratch marks that would be highlighted when the stain is applied.
Step #9: Apply Coating
pply a coat of wood stain and allow it to dry for at least 12 hours before lightly buffing away the roughness with a piece of grade 0000 steel wool. This will take off the little hairs that pop up from the moisture of the stain soaking into the wood. You may need to apply a light second coat of stain if you notice the stain has lightened in some areas after buffing.
Step #10: Attach Bottom for Coffee Holder
Attach your square piece of thin plywood to the bottom side of the hole using wood glue. Make sure you apply only a light amount of glue, because as you clamp it in place, the glue will ooze out. After clamping the plywood into place, you must wipe away the excess glue right away, or the dried glue will be visible on the final product.
Step #11: Seal the Sleeve
Seal the sleeve with two light coats of polyurethane. This will protect it from the moisture of cup condensation.
The finished product is sleek, clean, and adds to the beauty of the sofa, rather than distracting from the room's style. We've loved using it so far! It's great for holding wine and cheese or beer and a bowl of chips too.
Please login to comment.
Don't have an account?
Sign Up for free